Native App Icons for .NET MAUI: Android and iOS
How to use custom images as app icons in .NET MAUI, step-by-step.
.NET MAUI provides a great way of creating icons with MauiIcon resources, creating rasters for every platform during compilation. There could come a time when you would want to use custom pixel perfect images for an app icon, like native apps do. You would most likely find a trick of embedding raster images into SVG to be used as MauiIcon, though this approach might also have its limitations.
In this article example we will create native icons for Android and iOS for our existing .NET MAUI (.NET 9) app. Some of you may have read the previous article about creating a Breakout Game in .NET MAUI, and now we will publish it to Google Play and AppStore. For that matter we would need a game icon, most games even put their screenshots inside the icon, so we would use an image too.
We will keep the MauiIcon entry as a fallback for all platforms, but override it with platform-specific custom resources for iOS and Android.
Android: Creating and Integrating Custom Icons
Using Android Studio
Our strategy would be to create a simple app, you can just create a blank one and then create icons for it, then copy-paste created resources into our MAUI project.
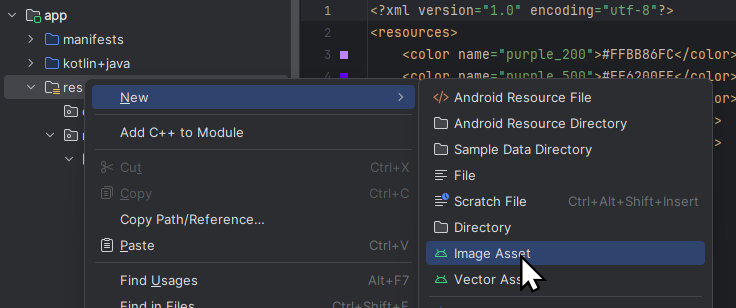
Launch Android Studio, I am using Meerkat version here, and create a new empty project, then right-click on res folder and add a new Image Asset.
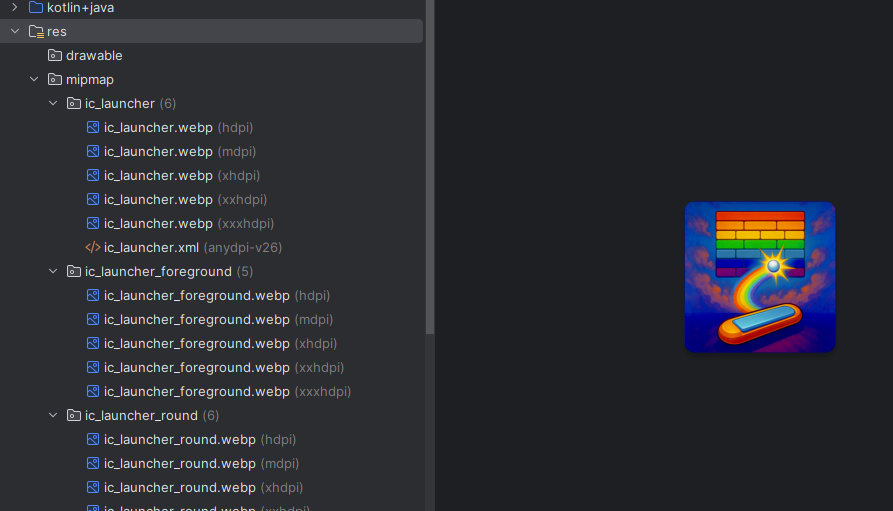
Select your high-resolution PNG (ideally 1024x1024 or higher) and configure adaptive icons. I played with Resize so that my icon is nicely wrapped for all rounded cases and have set a custom background color.

Generate the icon set and you will see that we now have lots of different size icons in a WEBP format.
Integrating into MAUI
Now still inside Android Studio right-click on res folder and choose Open In -> Explorer.
We now need to copy-paste the following into our Platforms\Android\Resources MAUI app folder:
1
2
3
4
5
6
7
8
9
10
11
12
13
14
15
app\src\main\res\
├── mipmap-anydpi-v26\
│   ├── *.*
├── mipmap-hdpi\
│   ├── *.*
├── mipmap-mdpi\
│   ├── *.*
├── mipmap-xhdpi\
│   ├── *.*
├── mipmap-xxhdpi\
│   ├── *.*
└── mipmap-xxxhdpi\
│   ├── *.*
└── values\
│   ├── ic_launcher_background.xml
Then we need to use the native icon instead of the generated MauiIcon, open AndroidManifest.xml as source code and replace appicon with ic_launcher:
1
2
3
4
5
<?xml version="1.0" encoding="utf-8"?>
<manifest xmlns:android="http://schemas.android.com/apk/res/android" android:versionName="1.00" android:versionCode="100101">
	<application android:allowBackup="true" android:icon="@mipmap/ic_launcher" android:roundIcon="@mipmap/ic_launcher_round" android:supportsRtl="true"></application>

</manifest>
The ic_launcher.xml and ic_launcher_round.xml files define adaptive icons that work with Android 8.0+ launcher theming.
Now if you try to compile the app you would get a nice "resource mipmap/ic_launcher_foreground (aka com.appomobi.drawnui.breakout:mipmap/ic_launcher_foreground) not found. so we will add the following inside our csproj file:
1
2
3
4
<!-- Custom Android icons: include webp resources-->
<ItemGroup Condition="$(TargetFramework.Contains('android'))">
  <AndroidResource Include="Platforms\Android\Resources\*\*.webp" />
</ItemGroup>
This ensures all your custom Android icons are properly included during compilation and we now have a nice custom icon for Android! 🥳
iOS: Creating and Integrating Custom Icons
Structure of iOS App Icon Sets
For iOS the creation of icons consists in creating just different sizes of the same original image. There are many free tools out there, you could use IconSlayer. There put your sizes:
1
20, 29, 40, 58, 60, 76, 80, 87, 120, 152, 167, 180, 1024
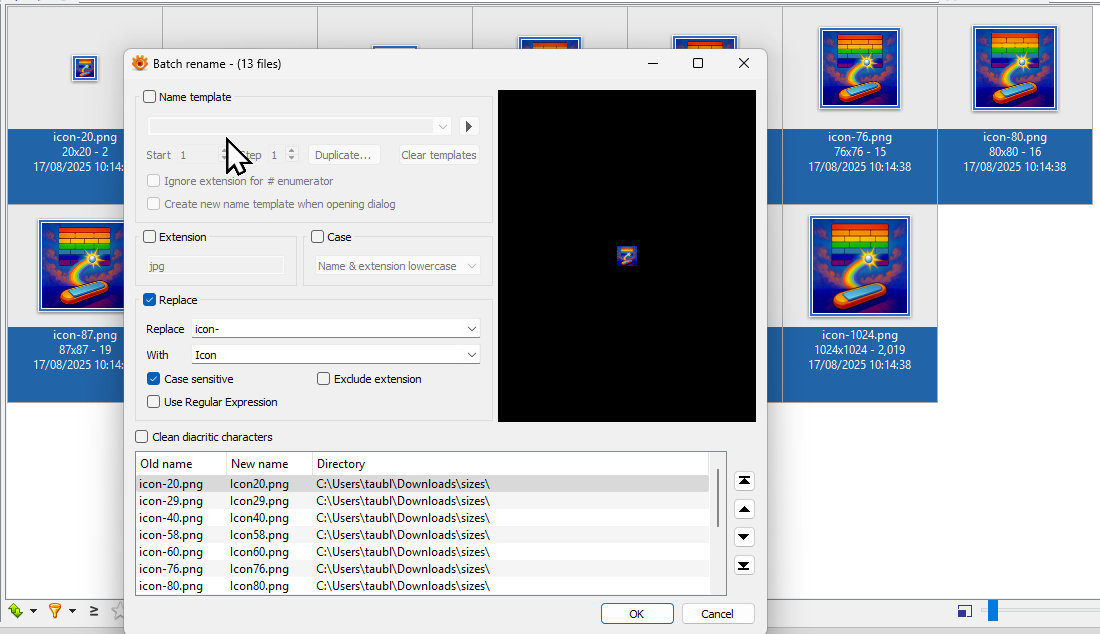
inside Custom Sizes field and check it, then drop the original image and it will generate all the sizes for you. After clicking Export you get a zip file with all the icons. They will be named like icon-20.png but we need a different name and without the -, so we will use XnView MP to batch rename them: select all and right-click to Rename replacing all icon- with Icon.
Integrating into MAUI
Now we need to place these files into our MAUI project inside Platforms\iOS\Assets.xcassets\icon.appiconset, create these folders if missing.
Add the following file Contents.json too along with your images, this file defines the icon set metadata.
Now let’s tell the app to use this icon set, open Platforms\iOS\Info.plist and add our icon set:
1
2
  <key>XSAppIconAssets</key>
  <string>Assets.xcassets/icon.appiconset</string>
If there is an existing XSAppIconAssets entry there replace it the the one above.
Edit csproj file to add:
1
2
3
4
<!--Custom iOS icons-->
<ItemGroup Condition="$(TargetFramework.Contains('ios')) == true">
  <BundleResource Include="Platforms\iOS\Assets.xcassets\*\*" />
</ItemGroup>
and now we have a nice custom icon for iOS too! 🥳
Testing Your Icons
When changing app icons, always perform a clean rebuild:
- Clean the solution: This removes cached build artifacts
- Delete bin/obj folders: Sometimes cached resources persist
- Rebuild completely: Don’t just build - rebuild from scratch
- Restart physical device/simulator as it may cache the previous icon
Professional Results
Whether you’re building a game with complex 3D-rendered icons or a professional app with a pixel-perfect design this approach delivers professional-quality app icons that match your brand vision. You can get maximum control over the visual elements to make your app icons stand out in competition.
In case you would want to see a published working example of .NET MAUI app with such native icons please check out the Breakout repo.